The Executive’s Guide to Residential Golf Simulators
When a client calls me about a residential golf simulator installation, the conversation rarely starts with launch monitors or projection specs. It starts with one question: “How do I make this look like it belongs in the house?” That’s the right question. Anyone with a credit card and a YouTube channel can bolt a net to a garage wall. What separates a true luxury home simulator from that scenario is a disciplined approach to architecture, infrastructure, and finish — executed by people who have done it at this level before. This guide covers exactly what that process looks like, from the first structural assessment to the final calibration session.
Why Residential Golf Simulator Installation Is an Architectural Project First
The single most expensive mistake I see is treating a simulator as furniture you move into an existing room. It isn’t. A properly integrated home simulator is a permanent architectural feature — closer in scope to a home theater build-out than to hanging a flat-screen. That framing changes everything about how you plan, budget, and select your contractor.
The 11-Foot Ceiling Rule (and When to Push Higher)
The benchmark for an unrestricted full-swing environment is a minimum ceiling height of 11 feet from finished floor to the lowest obstruction. This isn’t a preference — it’s physics. A 6’2″ golfer with a driver reaches approximately 10’6″ at the apex of a fully extended swing. Anything below 11 feet creates swing inhibition, which means your clients quietly adjust their mechanics to avoid hitting the ceiling. By the time they realize it, the damage to their on-course game is already done.
For taller players, or for rooms where a Trackman iO is being ceiling-mounted rather than floor-positioned, I push clients toward 11’6″ to 12′. That additional clearance also provides meaningful acoustic buffer space above the baffling panels — something we’ll cover shortly.
Room Width and Length: The Minimums That Matter
Width is often underestimated. A minimum of 15 feet of usable width is required to comfortably accommodate right- and left-handed players without repositioning mats between sessions. For a dual-hitting-bay configuration — common in larger estate builds — plan for 22 to 24 feet of clear width.
Depth from hitting position to screen should sit between 16 and 20 feet. Shorter throw distances compromise image quality on standard projectors and increase ball-impact stress on the screen material. Professional-grade screens from manufacturers like Carl’s Place are engineered for repeated high-velocity impact, but they perform best with adequate throw depth.
The Infrastructure Beneath the Surface
The difference between a luxury build and a garage setup lives almost entirely in the infrastructure you can’t see after the project is complete. Hidden wiring, flush-mounted sensors, and sub-floor turf integration are the hallmarks of a professional residential installation — and they require planning before a single wall is framed.
Sub-Floor Turf Integration
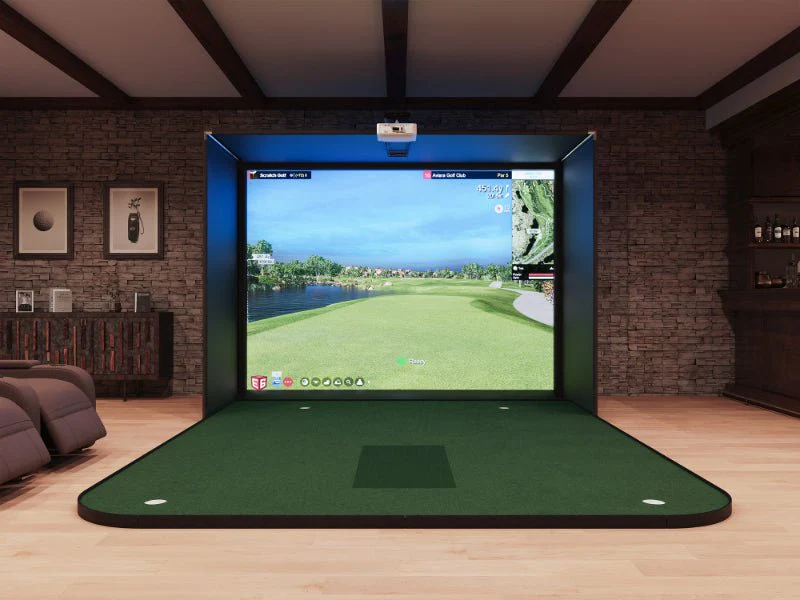
In a professionally executed build, the hitting mat doesn’t sit on top of the floor — it’s recessed into it. A licensed installer will coordinate with your general contractor to cut a recessed bay into the subfloor, typically 1.5 to 2 inches deep, sized precisely to your hitting mat dimensions. The result is a flush, seamless turf surface that looks like an interior design choice rather than an afterthought. This detail also eliminates the trip hazard at mat edges and reduces vibration transfer to the surrounding floor structure.
Dedicated 20-Amp Circuits and AV Infrastructure
Every high-end simulator room I spec includes a minimum of two dedicated 20-amp circuits — one for the projection system and one for all launch monitor and computing equipment. Running a GCQuad or Uneekor EYE XO2 on a shared household circuit introduces voltage fluctuations that can corrupt sensor calibration over time and, in worst cases, damage sensitive hardware.
Conduit routing for HDMI 2.1, Cat6A, and low-voltage power should be planned before drywall closes. Ceiling junction boxes for flush-mounted sensors, in-wall speaker cabling for immersive audio, and dedicated data drops for GSPro or E6 APEX server hardware should all be specified in the pre-construction drawing set. Retrofitting any of this after the fact is expensive and messy.
Selecting the Right Launch Monitor for a Luxury Home Simulator
This is where I lose patience with generic installer conversations. The hardware tier you choose has direct implications for room design, and not every contractor understands those implications. Here’s how the top residential units break down:
Foresight GCQuad
The GCQuad remains the gold standard for camera-based residential installations. Its quad-camera array delivers exceptional ball and club data in a compact, portable form factor. Because it uses high-speed cameras rather than radar, it performs consistently in fully enclosed indoor environments without interference concerns. It does require careful placement relative to the ball position — something a professional calibrates during setup, not the homeowner guessing after the fact.
Uneekor EYE XO2
For clients who want a truly flush, overhead-mounted installation, the Uneekor EYE XO2 is the unit I specify most frequently. Ceiling-mounted in a purpose-built housing, it disappears into the room design entirely. Its optically-enhanced tracking delivers outstanding club data and is fully compatible with both GSPro and E6 APEX. The mounting bracket and sensor alignment must be precise — this is not a self-install unit.
Trackman iO
The Trackman iO represents the ceiling-mounted radar category at its apex. Its dual-radar configuration delivers the most comprehensive ball-flight and club-delivery data available in the residential market. It’s the choice for serious single-digit players who want feedback that translates directly to on-course improvement. iO installations require specific ceiling height clearance, structural mounting assessment, and a calibration process that takes the better part of a day with a certified technician. It is not a box-and-drop product.
The Aesthetics Conversation: Winning the Room Argument
Every residential project eventually involves what the industry casually calls the Wife Approval Factor — and I’ll frame it more precisely as the household stakeholder conversation. A dedicated simulator room represents 300 to 500 square feet of prime residential real estate. Justifying that footprint requires the room to serve multiple functions and look intentional.
Acoustic Panels as Design Elements
Impact foam and acoustic treatment are non-negotiables in any serious build, but they don’t have to look clinical. Custom fabric-wrapped acoustic panels in architectural colors and geometric patterns have become a standard finish element in high-end builds. Combined with impact-rated wall padding behind the screen and side walls, these panels reduce ball-strike noise transmission by 60 to 75%, keeping the sound of a driver hit at 110 mph from registering in the adjacent living room.
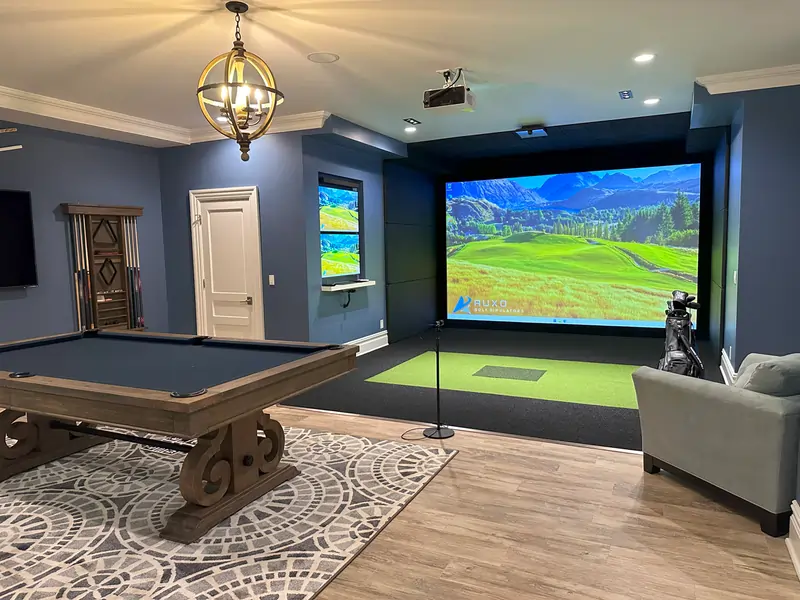
The Dual-Purpose Cinema Build
The most successful residential simulator rooms I’ve consulted on are rooms that function as a premium home cinema when a golf session isn’t active. A motorized 4K impact screen drops for simulator use and retracts to reveal a fixed projection surface for cinema viewing. BenQ’s LU series laser projectors are a recurring specification on these builds — the 20,000-hour laser light source eliminates lamp-replacement maintenance cycles and delivers consistent color calibration across both use cases. With the right AV integrator on your team, the transition between simulator and cinema mode is a single button press on a Crestron or Savant control panel.
That dual-purpose positioning transforms the budget conversation entirely. You’re no longer asking for approval of a golf room — you’re presenting a premium entertainment suite that happens to include a world-class golf simulator.
Why the Contractor You Choose Changes Everything
The gap in execution quality between a general AV contractor who “also does simulators” and a specialist who builds luxury residential simulator rooms is significant. The former will typically deliver a functional system. The latter will deliver an integrated environment — one where the seams between technology, architecture, and interior design are invisible.
What I look for in a qualified luxury residential installer:
- Documented experience with sub-floor turf integration and pre-construction coordination
- Certified calibration credentials from Foresight, Uneekor, or Trackman
- A portfolio that includes finished interior photos, not just hardware shots
- Familiarity with home automation integration (Crestron, Savant, Control4)
- Relationships with acoustic treatment specialists and custom fabricators
That combination is not universal. Most markets have one or two contractors who genuinely operate at this level, and finding them without a referral network means sorting through a long list of general AV installers who will overpromise and underdeliver on the finish.
Find a Verified Luxury Residential Installer
If you’ve read this far, you’re not looking for a basic setup — you’re looking for a room that reflects the same standards as the rest of your home. Our Verified Installer Directory is specifically curated to connect homeowners with contractors who specialize in luxury residential builds: professionals who understand architectural integration, have completed Trackman, Foresight, and Uneekor certifications, and can coordinate with your interior designer or general contractor from day one.
Skip the generic search results and the contractors who learned simulator installation last year. Browse our Verified Installer Directory and filter by residential specialty, hardware certification, and location to find the right team for your project.
Resources Worth Reading Before Your Consultation
- YardstickGolf.com: Launch Monitor Deep-Dive Reviews — Independent technical analysis of GCQuad, EYE XO2, and Trackman iO performance data
- r/golfsimulator Wiki: Room Build Guides — Community-sourced ceiling height and room dimension threads from real completed builds
- YardstickGolf.com: Projector Recommendations for Simulators — BenQ LU series vs. Optoma UHZ vs. Epson LS series breakdown
- r/golfsimulator: Uneekor Ceiling Mount Installation Threads — Real-world clearance and mounting discussions from the enthusiast community
Comments